
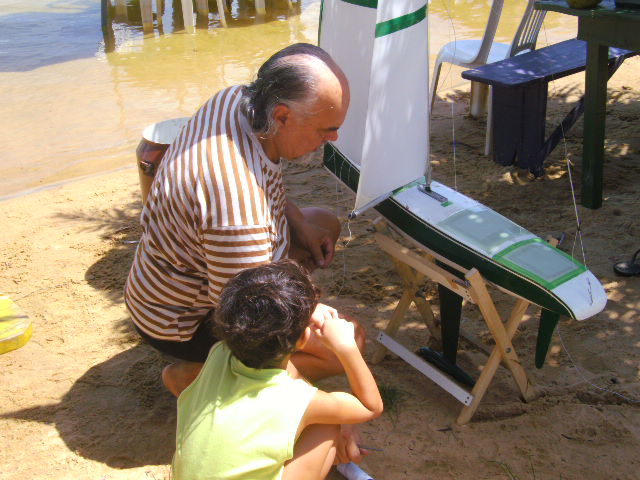
The Model Yachting Magazine, 165 issue, from the American Model Yachting Association, AMYA, is dedicated to the RG 65 Class. A very important contribution for the RG 65 Class.
Earl Boebert, Eric Rosenbaum, Bill Hagerup, Jim Linville, Bill Worrall, and others, gives important contributions to help peoples do the RG 65.
Knowledge that I took 2 years to get were kindly shared by these enthusiasts for all the people who loves radio controlled sailboats.
Thanks to Mauricio Dantas, Eric Rosenbaum shared to me his articles to put in this page and in the others pages.
We greatly appreciate Eric Rosenbaum for his kindness in sharing through us highly useful knowledge.
It was a great and hard work of everyone who contributed to the magazine and if someone can also share his work, we would be honored to publish them.
————————————-
Introduction to Swing Rigs
By Eric Rosenbaum
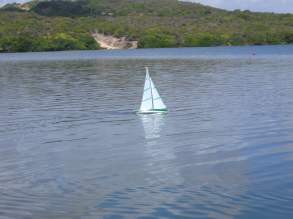
At its simplest, a swing rig is an uncomplicated construction where the mast rotates freely, and all the other components are attached to the mast and so turn with it. Some carbon fiber (CF) tubes, epoxy and Spectra line are all you need to make very competitive rigs. There are also much more complicated swing rigs that have been built in an effort to squeeze out a bit more performance. A lot of design work was done for Marblehead swing rigs, and some of the innovations include break-back rigs, main booms with goosenecks, and significantly curved masts.
In South America, where the RG65 Class has been going strong for decades, the fleets are overwhelmingly powered with swing rigs. In Europe, there is a more even split between swing rigs and conventional rigs. So far in the USA, conventional rigs are most common, but that may be changing. Swing rigs have generally been made to control two sails, although in some cases only one sail is used. The McRig design discussed elsewhere in this issue is a mono-sail version of a swing rig.
So, why should you consider using swing rigs? The rigs are easy and inexpensive to make, and the performance is every bit as good as a conventional rig. Some people think they are the best performing rigs in all conditions. I am not sure that I will go that far, but the rigs are really very efficient. Upwind, the sails set and perform much like a conventional rig. Downwind, the entire rig rotates perpendicular to the wind, so you get the maximum sail area projected. Since the rig is semi balanced, it takes less torque for the servo to handle the task, and that means lighter and less expensive servos. The rig is controlled by a single sheet, so running rigging is easier to design and install. There is no gooseneck, vang, deck hardware, spreader, or shrouds, and none of the typical hull reinforcements are necessary to hold all that rigging securely in place.
Rig changes are a snap. Since the sails are tuned to the rig without any connection to the boat, a rig can be tuned and ready to go in an instant. To switch rigs, the single sheet that controls the mast rotation must be disconnected, and then the mast is lifted out of the boat. The rig is still tuned and will remain that way until you ease the topping lifts and Cunningham.

Design Considerations
Swing rig jibs have less sail area as a percentage of the total sail area than is the case for conventional rigs. This is true because the whole rig has to turn like a windvane to tack the boat. A larger jib will make tacking more difficult. For swing rigs, the jib typically accounts for 25-30% of the rig’s total sail area. For a conventional rig, the jib is typically 35-45% of the total sail area.
The relatively smaller jib moves the center of effort (CE) of the rig aft, and this explains why a swing rig is mounted 20-25mm forward of a traditional rig. Since all else is equal regarding the hull shape and foil locations, the boat’s designed balance is maintained by keeping the CE in the same location regardless of rig type or size.
Rig Construction
A swing rig needs a solid base built into the boat and a low friction interface between the mast and the base tube. For the base, a CF tube is epoxied into the boat extending from the bottom of the hull to the top of the deck. The mast fits into the tube, and it must be constructed such that the fit is close but there is as little friction as possible. Bearings will reduce friction, and the two most common bearings are PTFE (Teflon) and sealed stainless steel ball bearings. Both methods are pictured below.

The base of a simple swing rig is shown. The white bearing materials are Teflon tube just below the “T” connection and shaped Teflon plug at the mast base. All photos by Eric Rosenbaum unless otherwise noted.
For a simple Teflon bearing system, you will need some thin Teflon tube that just fits over the lower mast section. This will be your upper bearing surface. At the bottom of the mast tube, a small mushroom-shaped piece of Teflon is glued into the mast. The lower bearing is sanded to just clear the base tube so that there is no mast wobble, and the rounded lower portion spins easily on the inside of the hull. The Teflon can be purchased from SmallParts.com, McMaster-Carr.com, and many other places. An old cutting board is my source for the solid bits needed for the mast base bearings.
For a ball bearing system, there are two choices. The ball bearings can be placed on the mast, or they can be in the base tube that is attached to the hull. Ball bearings can be found at Boca Bearings, Small Parts and McMaster-Carr. I buy sealed stainless steel bearings, which have an inside diameter (ID) of 5mm and an outer diameter (OD) of 9mm. For my ball bearing rigs, the bearings are mounted in the base tube so that one set can handle any number of rigs. A stub mast with a 5mm OD tube stands about 15cm above the deck, and the various masts slip over with a slight friction fit. A small retaining line can be added to connect the mast loosely to the deck. The retaining line allows you to lift the boat out of the water by the mast. A small wire loop is embedded in the deck, and a wire snap clips to it. The clip is tied to the mast just above the “T” with enough slack that the mast can rotate freely.

This is one way to make a ball bearing base for the mast. Working up from the bottom there is the CF base socket, which is a 12mm OD and 9mm ID pultruded CF tube. The roller tube is a 5MM CF tube with 5mm ID / 9mm OD bearings glued in place. The top bearing has a small flange at the top edge that prevents the bearing from slipping completely into the base tube. This, in turn, keeps the roller tube from touching the bottom of the boat. The tube with the roller bearings is held in place with a small screw that goes down into the deck – the screw’s top flange slightly overlaps the top bearing preventing its removal. The 5mm CF tube is sanded lightly to fit into the 7/32” x .014” aluminum tube that is epoxied into the mast tube. Some tape is used to fine tune the fit. The mast I am using here is a Skyshark 5PT purchased from Goodwindskites.com for approximately $10. The bottom two pieces in the photo stay in the boat unless removed for maintenance. Various rigs are plugged onto the CF tube which has the permanently mounted bearings. There is very little friction in this system.

Here is a version that places the bearings directly on the mast. Each rig will have its own bearings, and they will be sized to fit the mast OD and the base tube ID. Again, there is very little friction to interfere with rotation of the mast. Photo by Pascal Delapierre.
After the bearings and pivot base are designed, the only other tricky part is the “T” where the main boom and extension cross the mast. This connection sees some relatively high loads, so it must be built securely. In the photo above, Pascal makes the boom by taking an aluminum tube with an ID equal the OD of the main booms. The fore and aft booms are put into the aluminum, and then it is bent to a 10-15 degree deflection from straight. The bend helps keep the boom ends from hitting the water while sailing. The main booms are then glued in place. The joint is wrapped in fiberglass tape and epoxied into place. Finally, he sands the FG smooth and then adds a short length of CF woven tube over the top. A hole is drilled through the joint to accommodate the mast, and then the mast is epoxied into place.
Another method, and the one I am currently using, is seen below. In this case, the main booms are cut to length, and the ends are sanded to make them fit tightly against the mast. Hold sandpaper on the mast, and then work the boom ends up and down to sand a matching curve onto the tube’s end. Again, the outer tips of the booms are elevated approximately 5-10 degrees from horizontal. The three pieces are tacked together with CA glue. I should mention that anything that will be glued must be sanded and wiped clean beforehand.
Two plates are tacked in place with CA – in this case they are red tinted FG sheet (upside-down truncated triangles). Using a combination of plastic wrap and masking tape, seal off the bottom of the connection area and areas where you do not epoxy to stick. Slowly pour a thin epoxy in the top on both sides of the mast, and the whole area inside the red plates will fill with epoxy. Let it cure, and then clean off the tape.

The “T” connection area as described above. For the main booms, pultruded CF tubes of 5.3 to 6.0mm are perfect. The smaller flying jib boom (not pictured here) is typically 3.2 to 4.0mm. The small line wrapped around the “T” joint acts like a cheek block for the Cunningham line.
The photo below shows another way to connect the booms to the mast. In this case, the tubes were glued together, and then each side was reinforced with two layers of 10 oz. unidirectional CF tape and one layer of 8oz twill CF cloth. The assembly was wetted out with resin, and then put in a vacuum bag to form the CF to the tubes. Once cured and trimmed up, this is the result.

Another method for securing the booms to the mast uses CF cloth cured under pressure using a vacuum system. Notice that the mainsail has a large pocket that allows it to slide over the mast. Photo by Chris Jackson.
Small Details
On these simple rigs, there is no hardware needed. Every connection can be made with line and tied loops, and all rig and sail adjustments are made with bowsies or grommets. The photos below will provide some ideas on how everything is connected.

The crane is simply a piece of brass rod bent to shape. It has a small notch filed in the end to hold the topping lift line. The head of the sail is tied on. For very high aspect ratio sail plans, the SkyShark tube will need to be extended with 10-15cm of CF tube.

The forestay, topping lift, and jib halyard all use a small ring that is lashed and glued in place. This photo shows the mast extension needed for a Class maximum height rig. It is a 4mm CF tube epoxied into the top of the mast.

The jib boom is a CF tube between 3.2 and 4.0mm in diameter. The forward line is tied to a grommet, and it can be adjusted to fine tune the balance of the boat. The aft line controls the gap between jib and main. A small loop is tied into the middle of a short length of line, and then it is lashed and glued to the boom to provide a turning point for the adjustment line.

Here is a close-up of the gap adjustment line and terminations.

The main boom has grommets to adjust the Cunningham, rotation control sheet and outhaul. On the far end is the topping lift. As on the jib boom, loops are lashed in place wherever a control line needs to change direction.

This is a close-up of the sheet used to control the rig’s rotation. You can see the loop lashed to the mast and the grommet used to adjust the close-hauled boom angle.
Sail Plans
Sail plans can be of any design, as long as the total sail area does not exceed 2,250 square centimeters. In most cases, the “A” rig is the maximum size rig allowed under Class rules. The “B” and “C” rigs are often scaled down versions of the “A” rig. In many sail plans that you will see, the only real difference in the sail plans is the luff measurements. On my rigs, the luff drops by 20% from “A” to “B” and from “B” to “C”.
Another method for sizing rigs can be seen in the following photo sent in by Chris Jackson. In this case, the “A”, “B”, and “C” rigs are all the same size, but the aspect ratio keeps diminishing. Only the “D” rig is actually smaller in area.

Four rigs for different conditions. Photo by Chris Jackson.

A high aspect ratio design with the mast close to the maximum height limit. This is excellent in very light breezes and flat water. Drawing by Chris Jackson.

A lower aspect rig, but still at the Class maximum in sail area. Drawing by Chris Jackson.

This is a low aspect ratio rig, and it also is still basically at the class maximum in sail area.. Drawing by Chris Jackson.

This rig is actually smaller than the class maximum at approximately 75% of the allowable sail area. Drawing by Chris Jackson.
There are many sail designs available on the web. A great place to start your search is on this French site: http://rg65.free.fr/start.php Enjoy yourself!


Pingback: Footy Connection 2010 | AFL Footy Tipping
Pingback: Footy Connection | AFL Footy Tipping